AC Blowing Warm Air? I Fixed Mine With a $20 Capacitor the Same Day
Act one: the fix I paid for
A couple of years ago I was on a business trip when my wife called: the air conditioning was out. She called an HVAC tech, and the visit impressed her mostly by its speed. He had the part in his truck, because it’s a part that breaks all the time, and the whole thing cost a couple hundred dollars. Fine. That’s what the truck full of parts is for.
When I got home, I got curious about what he’d actually fixed. The bill said: capacitor. So I looked into it, watched a few videos of people replacing AC capacitors, and had the reaction that half the entries on this site come from. That’s it? The part was cheap, the swap was minutes. Which is exactly why a pro can fix it so fast.
I filed that away.
Act two: the Sunday before Labor Day
Then, one Sunday before Labor Day, the house felt a little warm. The thermostat read a couple degrees above the setpoint, and the air coming out of the vents was room-temperature, not chilly. Time to use what I’d filed away.
Out at the condenser, the diagnosis took one look: the unit was running and the fan was blowing, but the compressor never kicked on. A little research confirmed the most likely suspect was the capacitor again (the contactor was the runner-up). Capacitors are cheap, so the capacitor was the bet.
Here’s where the holiday math got interesting. What were the odds of getting an HVAC tech out on the Sunday evening before Labor Day? And at what holiday rate? Meanwhile, Amazon had the right capacitor with same-day delivery. I sprang for it without hesitating.
The swap I did this
- Kill the power. Outdoor units are required to have a disconnect switch mounted within sight of the unit, so you can know for certain nothing is flowing. Pull it. (Kill the breaker too; it costs nothing.)
- Open the service panel and find the capacitor.
- Discharge it by shorting across the terminals with an insulated screwdriver. A capacitor holds a dangerous charge even with the power off; this step is the whole reason the job is safe.
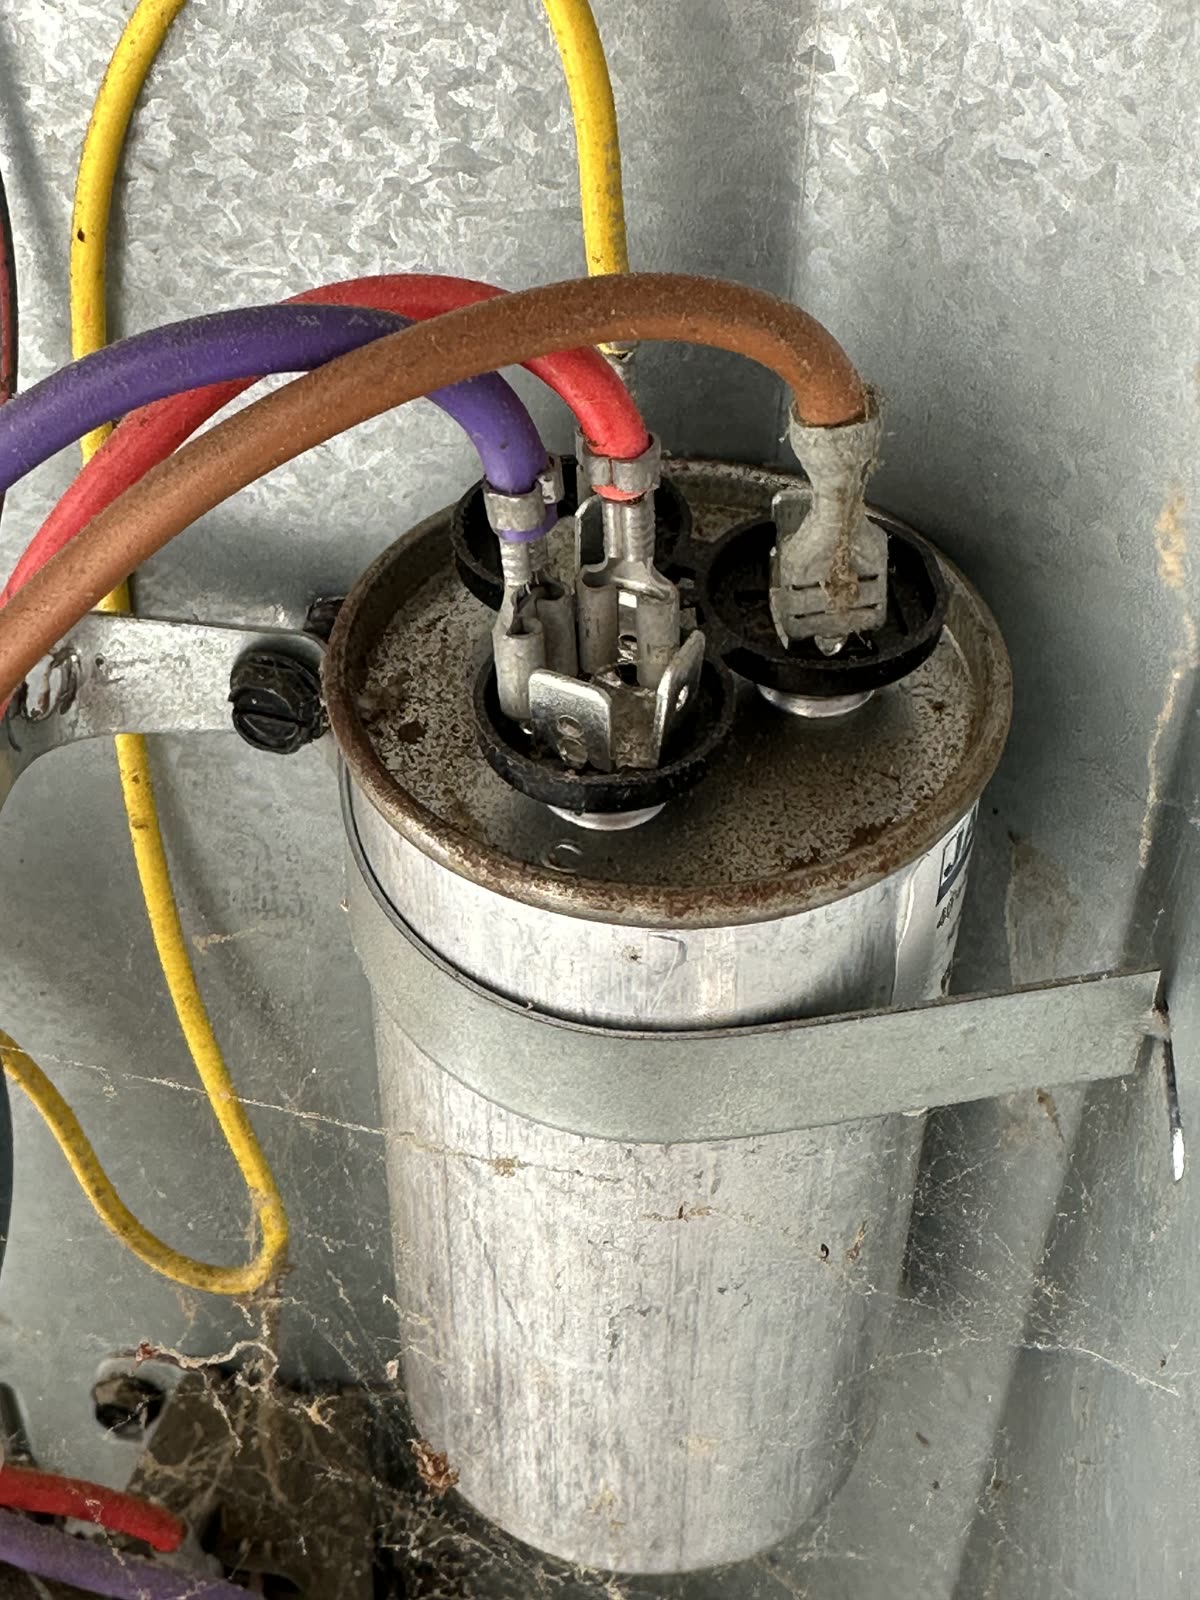
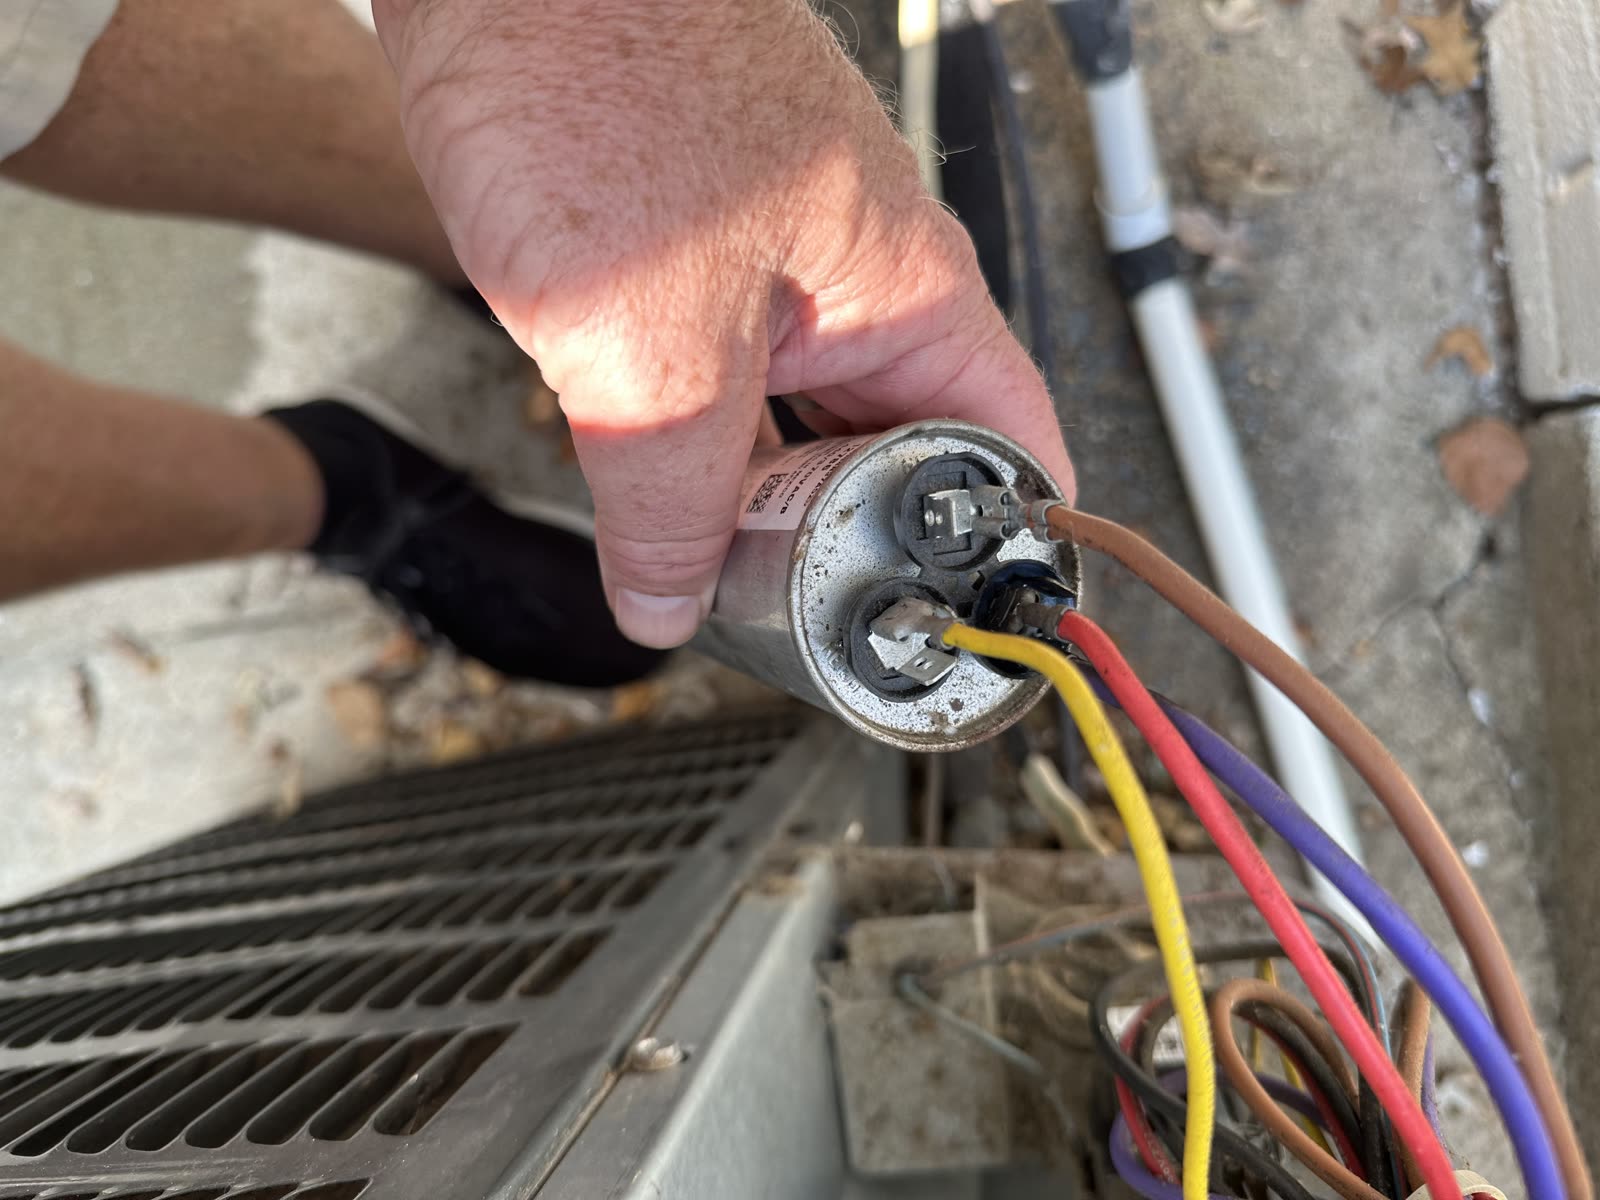
- Take a picture of the wiring before you disconnect anything. The terminals are labeled C, FAN, and HERM, and the photo settles every “which wire went where” question.
- Read the label on the old capacitor and match the replacement (details below).
- Transfer the wires to the new capacitor per your photo, strap it in, close the panel, and flip the disconnect back on.
Mine was immediate: the compressor kicked on, and the vents went cold. Not an expensive fix, not a hard fix. Just one that demands respect for the electricity involved.
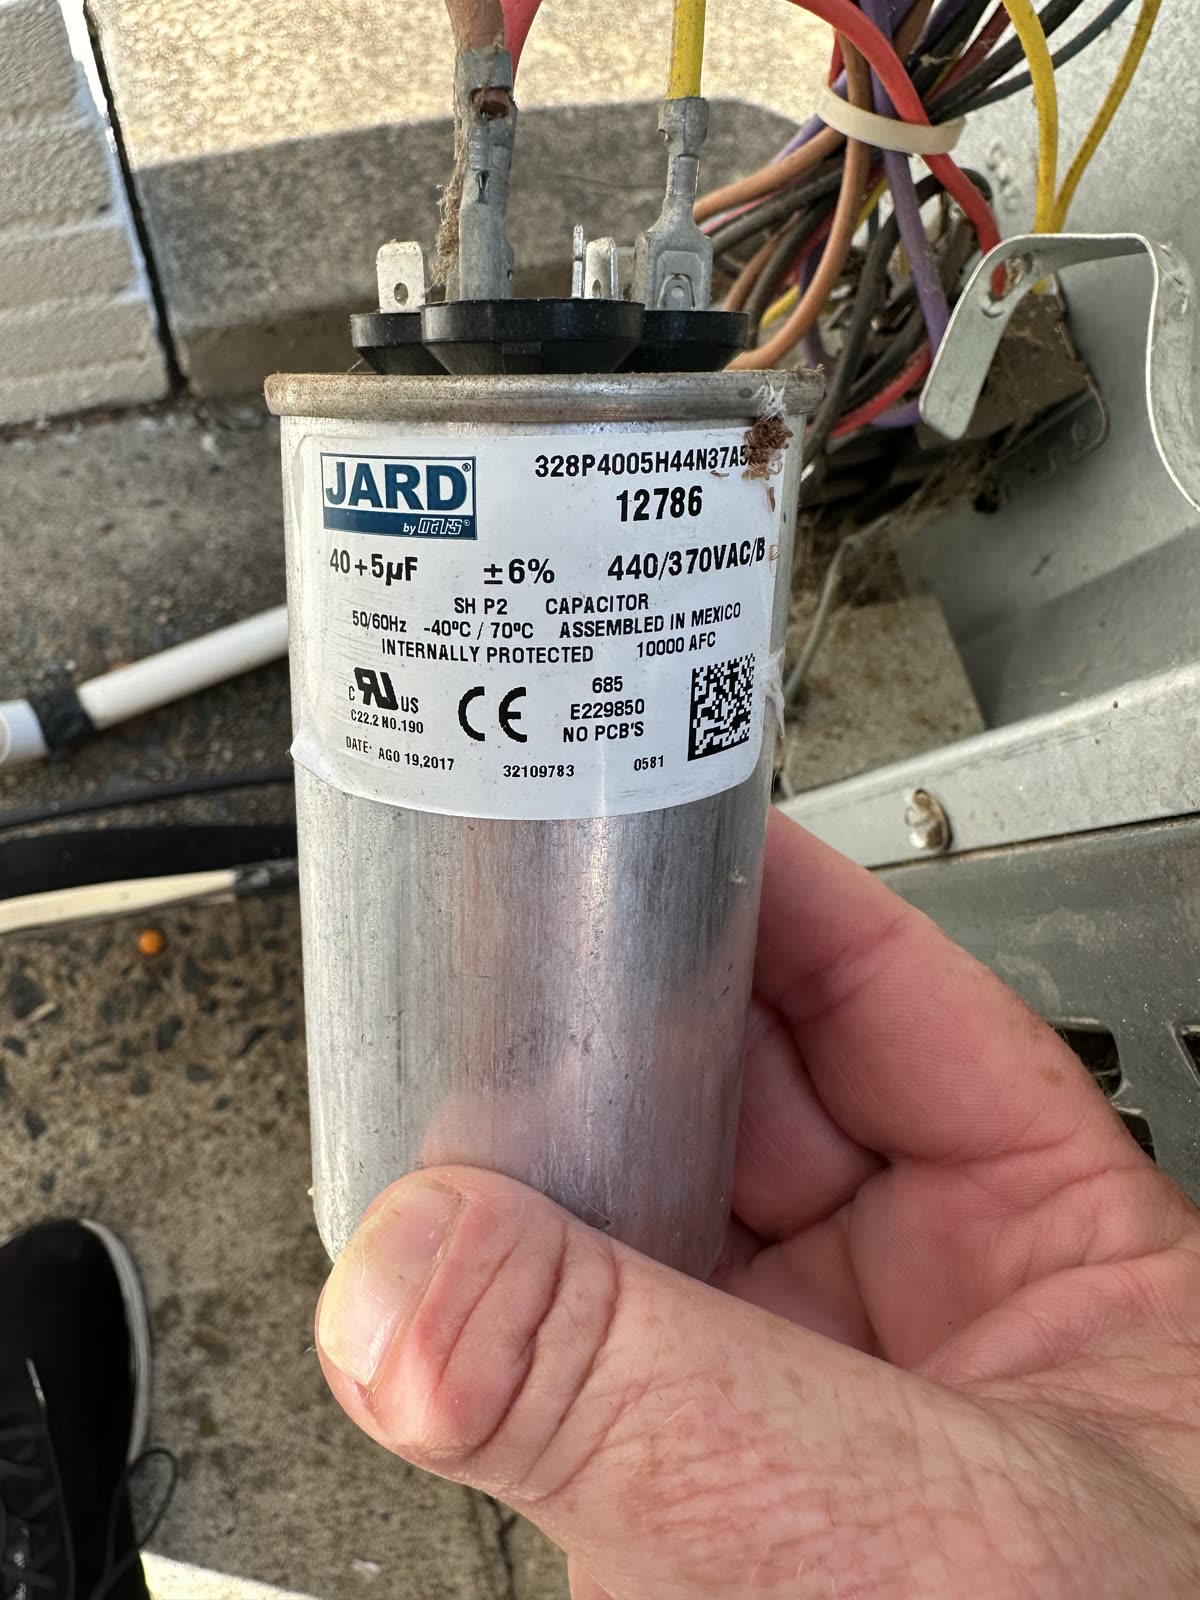
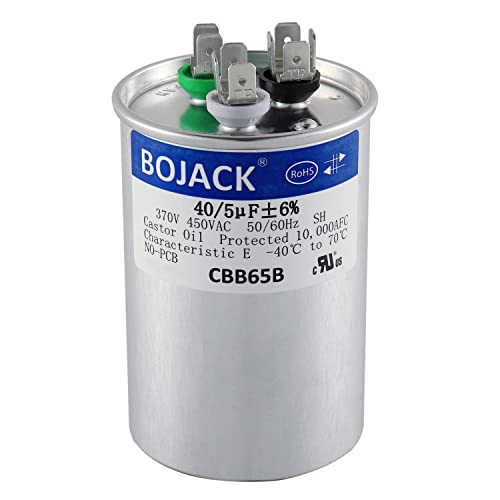
The one I used, matched to my unit's label. Yours must match YOUR label — the µF rating is not one-size-fits-all.
Price as of Jul 2, 2026 · As an Amazon Associate I earn from qualifying purchases.
How to buy the right capacitor
The right capacitor is determined by the ratings printed on the old one, not by your unit’s tonnage. Five rules:
- Match the microfarads (µF/MFD) exactly. This is the number that matters. A dual capacitor reads like “40+5 µF”: the big number runs the compressor (HERM), the small one runs the fan (FAN). Don’t substitute a different size.
- Voltage: same or higher. A 370 VAC capacitor can be replaced by a 440 VAC one with the same µF. Never the other direction. (Many, like mine, are rated 370/440 and cover both.)
- Run vs. start. Most outdoor units use a run capacitor, the metal oval or round can. A start capacitor is the black plastic cylinder, often paired with a relay. They are not interchangeable.
- Dual vs. two singles. Most condensers use one dual capacitor with three terminal groups (C / FAN / HERM). Some use two separate capacitors. Match what’s there.
- Trust the terminal labels, not the wire positions. The new capacitor’s terminals may sit in different spots. C is common, FAN is the fan, HERM is the compressor. Your photo plus the labels beats memory every time.
If you own a multimeter with a capacitance setting, you can verify both old and new: with power off and the capacitor discharged, each section should read within the tolerance printed on the can (a 40 µF ±6% section should read roughly 37.6 to 42.4).
Reading the sounds: the 60-second diagnosis Owner-reported
Owners and techs describe a consistent sound-map for “AC not cooling.” Stand at the outdoor unit while the thermostat calls for cooling:
| What you hear | What it usually means |
|---|---|
| Complete silence | Power problem: breaker, disconnect, contactor not pulling in, blown fuse, thermostat wiring |
| A click, then nothing | Contactor works; the load won’t start: capacitor, wiring, or motor |
| Humming or buzzing, fan still | The classic failed capacitor: the motor has power but no starting boost |
| Fan spins, air stays warm | Compressor (HERM) side of the dual capacitor, or a compressor/refrigerant problem (my case) |
Two physical tells on the capacitor itself: a bulged, mushroomed top or leaking oil means it’s dead, no meter required. But a normal-looking capacitor can still be bad — mine looked fine.
If the new capacitor doesn’t fix it Owner-reported
The forums are full of “replaced the capacitor, still dead.” The usual culprits, in order:
- The contactor, the relay that sends 240V to the fan and compressor. Points get pitted and burnt, and (genuinely) ants and bugs get crushed between the contacts and block them. About $25 and 30 minutes if it’s bad.
- The disconnect is in the OFF position. One owner chased a dead unit for a day; the pull-out disconnect had been reinserted upside down. The ON/OFF labels are tiny.
- Blown fuses in the disconnect block. Check continuity, and if a fuse blew, find out why before just replacing it.
- A seized or burned-out fan motor. With power off, the fan blade should spin freely by hand. A motor that ran too long on a dying capacitor may itself be damaged.
- Miswiring. HERM and FAN swapped, or the common wire left off. This is what the photo is for.
The rest of the “AC not cooling” map, briefly Owner-reported
| Symptom | First suspects |
|---|---|
| Weak cooling, runs constantly | Dirty air filter (the #1 cause), dirty condenser coils |
| Ice on the indoor coil or lines | Clogged filter or low refrigerant; thaw it before anything else |
| Cools poorly, hissing, oily residue | Refrigerant leak: not a DIY fix; EPA-certified techs only |
| Water around the indoor unit | Clogged condensate drain; wet-vac the line, flush with vinegar |
| Breaker trips immediately | A short — stop and call a pro |
Replaced a capacitor and found something different behind the panel? Tell me what it was. I’ll add it to the diary.